


Instagram has evolved from a simple photo-sharing app to a powerful visual storytelling platform where your profile’s aesthetic matters more than ever. According to Instagram’s official business blog, visual consistency can increase brand recognition by up to 80%.
One of the most impactful ways to elevate your Instagram presence is through Instagram grid posts – a creative technique that transforms your feed into a cohesive, eye-catching gallery.
Whether you’re a brand, influencer, or content creator, mastering Instagram grid layouts can significantly boost your engagement and follower growth.
In this comprehensive guide, we’ll show you exactly how to create professional-looking grid posts using free tools, share expert tips, and reveal strategies that top Instagram accounts use to captivate their audience.
By the end of this article, you’ll know how to use an Instagram grid maker, understand different grid layouts, and create posts that make visitors stop scrolling and hit that follow button. Learn more about Instagram’s best practices in their Creator Account Guide.
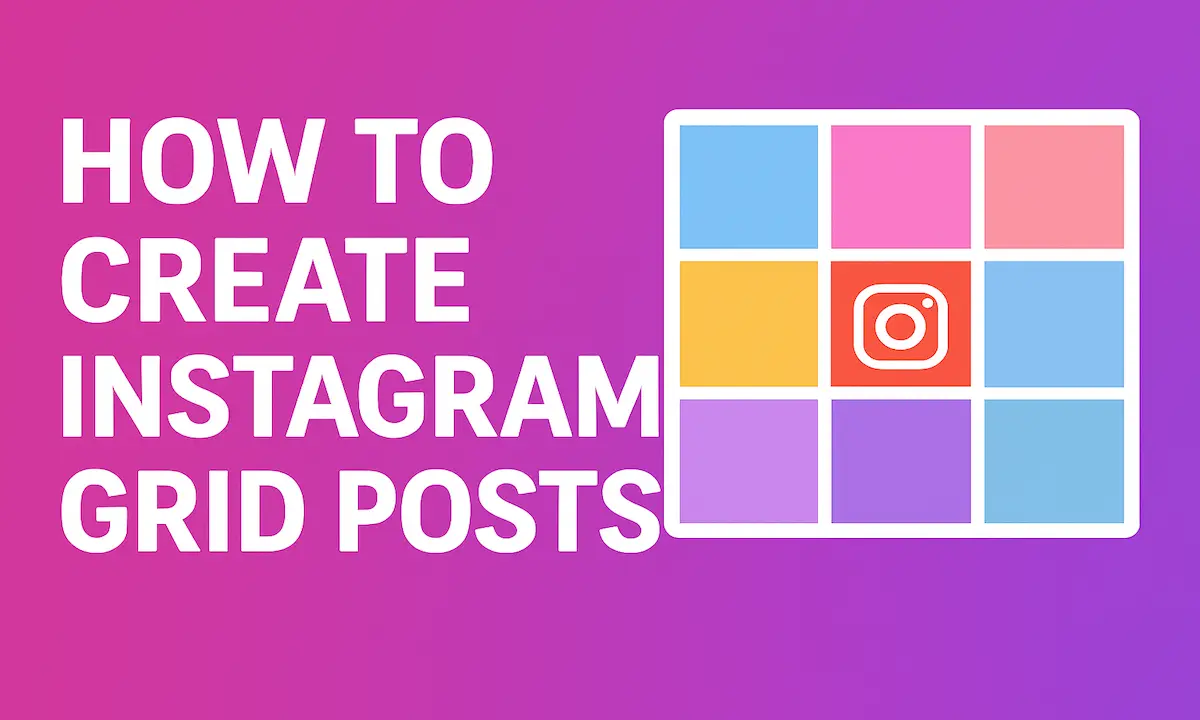
What is an Instagram Grid Post?
An Instagram grid post is a strategic layout where multiple images work together to create one large, cohesive visual when viewed on your Instagram profile. Instead of posting random, disconnected images, grid posts allow you to:
- Create panoramic images split across 3, 6, or 9 posts
- Design themed layouts that tell a visual story
- Build brand consistency with coordinated colors and styles
- Increase profile visits as users want to see the complete picture
- Boost engagement through curiosity-driven content
The most popular Instagram grid layouts include:
- 3×1 Grid (3 posts in a row)
- 3×2 Grid (6 posts creating a rectangle)
- 3×3 Grid (9 posts forming a perfect square)
- Diagonal grids, checkerboard patterns, and rainbow feeds
Why Instagram Grids Matter in 2025
According to recent Social Media Examiner research, profiles with cohesive grid layouts see up to 30% higher profile visit rates and 25% better follower conversion compared to random posting patterns. Hootsuite’s Instagram Marketing Guide also emphasizes the importance of visual consistency for brand growth. Here’s why:
- First Impressions Count: Your grid is the first thing visitors see
- Professional Appearance: Coordinated feeds signal quality content
- Storytelling Opportunity: Grids let you tell bigger stories
- Algorithm Benefits: Higher engagement from grid posts improves reach
- Brand Recognition: Consistent aesthetics build memorable brands
Understanding Instagram Grid Layouts
Before diving into creation, let’s understand the different types of grid layouts and when to use each one.
1. The Classic 3×1 Grid Layout
The 3×1 grid is the simplest and most popular format, consisting of three consecutive posts that form one horizontal image. Perfect for:
- Landscape panoramas
- Wide product showcases
- Before-and-after transformations
- Quote graphics with extended text
- Event announcements
Engagement Tip: 3×1 grids work best when the middle post can also stand alone as a compelling image, encouraging users to explore your profile for the full picture.
2. The Stunning 3×3 Grid (9-Grid)
The 9-grid layout is the ultimate Instagram aesthetic statement. Nine posts combine to create one massive square image that dominates your profile. Ideal for:
- Brand launches and major announcements
- Product collections
- Seasonal campaigns
- Personal milestones
- Art portfolios
Pro Tip: Plan your 9-grid carefully – you’ll need to maintain this layout for optimal visual impact, which means posting 9 images at once or over a short period.
3. The Versatile 3×2 Grid
A 6-post grid offers flexibility while still making a strong visual statement. Great for:
- Story-driven content (beginning, middle, end)
- Product lineups
- Tutorial sequences
- Travel diaries
- Weekly highlights
4. Checkerboard and Diagonal Patterns
Advanced users create alternating patterns where every other post follows a theme:
- Checkerboard: Alternating between quotes and photos
- Diagonal: Creating diagonal lines of similar content types
- Rainbow Feed: Organizing posts by color progression
How to Create Instagram Grid Posts: Step-by-Step Guide
Now let’s get into the practical process of creating your own Instagram grid posts.
Step 1: Plan Your Grid Layout
Before touching any tools, planning is crucial:
- Define Your Goal: What do you want to achieve? Brand awareness? Product launch? Aesthetic appeal?
- Choose Your Layout: Decide between 3×1, 3×2, or 3×3 based on your content
- Select Your Image: Pick a high-resolution image (minimum 1080×1080 pixels) that works well when split
- Consider the Feed Context: How will this fit with your existing posts?
Planning Checklist:
- Image resolution: At least 3240x1080px for 3×1, 3240x2160px for 3×2, 3240x3240px for 3×3
- Important elements centered (avoid cutting faces or text awkwardly)
- Color scheme matches your feed aesthetic
- Text is readable when split
- Each individual post looks decent on its own
Step 2: Choose Your Instagram Grid Maker Tool
You’ll need a reliable image splitter for Instagram to divide your image perfectly. According to Buffer’s social media toolkit guide, choosing the right tool can save hours of editing time. Here are key features to look for:
Essential Features:
- Free to use (no watermarks)
- Multiple grid options (3×1, 3×2, 3×3, custom)
- High-quality output
- No installation required (web-based)
- Mobile-friendly
- Proper Instagram dimensions (1080x1080px per post)
Recommended: InstaTrackr Grid Maker
InstaTrackr offers a completely free Instagram grid maker that:
- Splits images perfectly for Instagram dimensions
- Provides instant preview
- Supports custom grid sizes
- Maintains image quality
- Works on all devices
- No sign-up required
Try InstaTrackr’s Free Grid Maker →
You might also want to check out our Instagram Carousel Maker for creating swipeable multi-image posts.
Step 3: Upload and Split Your Image
Using InstaTrackr’s grid maker:
- Visit InstaTrackr.com and navigate to the Grid Maker tool
- Upload Your Image: Click the upload button and select your prepared image
- Select Grid Type: Choose your desired layout:
- 3×1 (3 columns, 1 row)
- 3×2 (3 columns, 2 rows)
- 3×3 (3 columns, 3 rows)
- Custom sizes available
- Preview the Split: The tool shows exactly how each post will look
- Adjust if Needed: Some tools let you reposition the image before splitting
- Download Split Images: Save all individual images to your device, numbered in order (1, 2, 3, etc.)
Pro Tip: Always download images in the correct order. For more tips on Instagram image optimization, check out Instagram’s Image Best Practices.
Step 4: Prepare Captions and Hashtags
Each post in your grid needs a caption, but strategy matters:
Caption Strategy for Grid Posts:
- First Post (Top-Right): Strong hook with main message and full hashtags
- Middle Posts: Shorter captions with arrows (→) directing to next post
- Last Post (Bottom-Left): Call-to-action and reminder to see full image on profile
Example Caption Sequence (3×1 Grid):
- Post 1: BIG ANNOUNCEMENT! We’re launching something incredible… (swipe to see more) → #newlaunch #comingsoon”
- Post 2: “Keep going → #exciting #staytuned”
- Post 3: “Visit our profile to see the full picture! Link in bio. #launch2025”
Hashtag Tips:
- Use 15-20 relevant hashtags on the first post (learn more in Sprout Social’s Hashtag Guide)
- Use 5-10 on middle posts
- Include branded hashtags throughout
- Mix popular and niche hashtags
Step 5: Upload to Instagram in Correct Order
This is critical – Instagram displays posts in reverse chronological order, so you must upload backwards:
Correct Upload Order (3×1 Grid):
- Upload Post 3 (bottom-left) FIRST
- Upload Post 2 (bottom-middle) SECOND
- Upload Post 1 (bottom-right) THIRD (most recent)
For 3×3 Grids: Upload from bottom-right to top-left (posts 9, 8, 7, 6, 5, 4, 3, 2, 1)
Important Notes:
- Upload quickly (within 5-10 minutes) for best feed appearance
- Don’t get distracted between posts
- Use airplane mode between uploads if needed to maintain focus
- Consider using Instagram’s scheduling tools for simultaneous posting
Step 6: Verify on Your Profile
After uploading:
- Visit your Instagram profile
- Check that all posts align correctly
- Verify the image looks cohesive
- Test by taking a screenshot to see the full picture
- Share in your Stories to drive traffic to your profile
Best Free Instagram Grid Maker Tools
Let’s compare the top free tools for creating Instagram grid posts:
1. InstaTrackr Grid Maker (Recommended)
Pros:
- Completely free with no watermarks
- No registration required
- Supports all grid sizes
- Web-based (works on any device)
- Fast processing
- High-quality output
- Additional Instagram tools included
Best For: Everyone from beginners to professionals
Start Creating Grids for Free →
2. Online Image Splitter
Pros:
- Simple interface
- Basic splitting functionality
- No download needed
Cons:
- Limited customization
- Generic tool (not Instagram-specific)
- May not maintain perfect Instagram dimensions
3. Canva (with manual cropping)
Pros:
- Robust design features
- Templates available
- Design and split in one place
Cons:
- Not a dedicated splitter
- Requires manual work
- Pro features need subscription
Learn more about Canva’s capabilities in Canva’s Design School.
4. Mobile Apps (Grid Post, Unfold, etc.)
Pros:
- Convenient for mobile users
- Instagram integration
- Quick uploads
Cons:
- Usually require app download
- May include watermarks
- Limited free features
- Storage space needed
Winner: For pure grid splitting without hassle, InstaTrackr’s free Instagram grid maker offers the best combination of simplicity, quality, and features.
For carousel posts specifically, try our Instagram Carousel Generator.
Instagram Grid Post Ideas That Drive Engagement
Need inspiration? Here are proven grid post ideas across different niches:
For Businesses & Brands
- Product Launch Grids: Showcase new products across 9 posts with each post highlighting different features
- Customer Testimonials: Create a 3×2 grid with customer photos and quotes
- Behind-the-Scenes: Show your workspace, team, or process across multiple posts
- Sale Announcements: Bold, unmissable 3×3 grids for major promotions
- Brand Story Timeline: Tell your origin story chronologically
For Influencers & Content Creators
- Monthly Recaps: Best moments from the month in a 9-grid
- Transformation Series: Before/during/after in 3×1 format
- Quote Collections: Inspirational quotes with aesthetic backgrounds
- Mood Boards: Color-coordinated lifestyle inspiration
- Tutorial Sequences: Step-by-step guides in order
For Photographers & Artists
- Portfolio Showcases: Best work displayed in grid format
- Series Collections: Related images telling one story
- Color Gradients: Rainbow or ombre transitions across the grid
- Landscape Panoramas: Breathtaking wide shots split perfectly
- Before/After Edits: Show editing process and final results
For Travel & Lifestyle
- Destination Guides: Multiple highlights from one location
- Travel Maps: Custom maps showing journey routes
- Experience Collections: Different activities from one trip
- Seasonal Themes: Autumn leaves, winter scenes, etc.
- Food Journeys: Culinary experiences from travels
Advanced Instagram Grid Strategies
Take your grid game to the next level with these advanced techniques:
1. The Puzzle Feed Technique
Create an entire feed where every post is part of ongoing grids. When done right, this creates an incredibly cohesive profile where users are encouraged to scroll through everything.
How to Execute:
- Plan 3-4 weeks of content in advance
- Use a feed planner app to visualize
- Maintain color consistency
- Alternate between grids and standalone posts for variety
2. Diagonal Storytelling
Instead of horizontal grids, create diagonal narratives that flow from top-right to bottom-left, encouraging natural scrolling behavior.
3. Border Grids
Add consistent borders or frames to all posts, so even non-grid posts maintain visual cohesion. This creates a “gallery wall” effect.
4. Thematic Rows
Each row of three posts follows a theme:
- Row 1: Monday motivation quotes
- Row 2: Product features
- Row 3: Customer content
- (Repeat pattern)
5. Color-Block Grids
Organize your entire feed by color blocks – nine red posts, then nine blue posts, creating dramatic visual shifts.
Common Instagram Grid Mistakes to Avoid
Learn from others’ mistakes:
Mistake 1: Uploading in Wrong Order
Problem: Posts appear jumbled on your profile
Solution: Always upload backwards (last post first)
Mistake 2: Poor Image Quality
Problem: Pixelated or blurry split images
Solution: Use high-resolution source images (minimum 3240px width for 3×1)
Mistake 3: Cutting Important Elements
Problem: Faces, text, or key features split awkwardly
Solution: Use grid preview tools before splitting
Mistake 4: Inconsistent Posting Timing
Problem: Long gaps between grid posts break visual flow
Solution: Upload all grid posts within 10-15 minutes
Mistake 5: Ignoring Individual Post Appeal
Problem: Each split image looks bad alone, reducing engagement
Solution: Ensure each post works as a standalone image too
Mistake 6: No Mobile Preview
Problem: What looks good on desktop may not work on mobile
Solution: Always check mobile preview before posting
Mistake 7: Overusing Grids
Problem: Too many grids make your feed feel stiff and planned
Solution: Balance grids with regular posts (aim for 20-30% grid posts)
Instagram Grid Post Dimensions & Technical Specs
Get technical details right for perfect results:
Optimal Image Dimensions
For 3×1 Grid (3 posts):
- Total image: 3240 x 1080 pixels
- Each split: 1080 x 1080 pixels
- Aspect ratio: 3:1
For 3×2 Grid (6 posts):
- Total image: 3240 x 2160 pixels
- Each split: 1080 x 1080 pixels
- Aspect ratio: 3:2
For 3×3 Grid (9 posts):
- Total image: 3240 x 3240 pixels
- Each split: 1080 x 1080 pixels
- Aspect ratio: 1:1 (perfect square)
File Format Recommendations
- Format: JPG or PNG
- Color Space: sRGB (as recommended by Adobe’s color management guide)
- File Size: Under 8MB per image
- Compression: Minimal (Instagram compresses anyway)
Instagram Display Specifics
- Profile grid displays at 293×293 pixels per post on mobile
- Desktop shows at approximately 309×309 pixels
- Upload at 1080×1080 for best quality
- Instagram may apply slight compression
For detailed specifications, refer to Instagram’s official size guide.
Also check out our Instagram Post Size Calculator for quick dimension references.
How to Plan Your Instagram Grid Feed
Strategic planning ensures long-term success:
Tools for Feed Planning
- Preview Apps:
- Design Tools:
- Canva (for creating images)
- Adobe Spark
- Over app
- Content Calendars:
Learn more about content planning in HubSpot’s Social Media Calendar Guide.
You can also use our Instagram Content Planner to organize your posts.
Monthly Planning Process
Week 1: Brainstorm content themes and grid ideas
Week 2: Create and edit all images
Week 3: Split images using Instagram grid maker
Week 4: Schedule and publish
Content Batching Tips
- Shoot multiple grid concepts in one day
- Create templates for recurring grid types
- Maintain a “grid ideas” folder on your phone
- Save color palettes for consistency
Measuring Your Instagram Grid Success
Track these metrics to optimize your grid strategy:
Key Performance Indicators (KPIs)
- Profile Visit Rate: How many people click through to see full grid
- Follower Growth: Spike after posting grid content
- Engagement Rate: Likes and comments per grid post
- Save Rate: High saves indicate strong content (learn more in Instagram’s Creator Insights)
- Shares: Story reshares and DM forwards
Instagram Insights to Monitor
- Reach and impressions per grid post
- Profile activity during grid campaigns
- External link clicks (if applicable)
- Story interactions about grid posts
For detailed analytics tracking, use InstaTrackr’s Analytics Dashboard which provides comprehensive metrics beyond Instagram’s native insights.
A/B Testing Ideas
Test different variables:
- 3×1 vs 3×3 formats
- Upload timing (all at once vs. spread out)
- Caption styles (storytelling vs. concise)
- Color schemes (monochrome vs. vibrant)
- Content types (quotes vs. photos vs. products)
Instagram Grid Posts: Best Practices 2025
Follow these expert tips for maximum impact:
Do’s
- Plan ahead: Design your entire feed layout before posting
- Maintain quality: Never sacrifice image quality for grid aesthetic
- Tell stories: Use grids to create narrative sequences
- Stay consistent: Match your brand colors and style
- Engage quickly: Respond to comments on grid posts immediately
- Use Stories: Direct followers to check out your profile grid
- Test regularly: Try different grid formats and track results
- Mix it up: Balance grids with regular posts (70/30 ratio)
Don’ts
- Don’t post incomplete grids: Upload all parts together
- Don’t ignore analytics: Learn what works for your audience
- Don’t overcomplicate: Simple, clean grids often perform best
- Don’t forget mobile: Always preview on phone before posting
- Don’t use low-res images: Quality matters more than quantity
- Don’t copy others: Create original content that reflects your brand
- Don’t neglect captions: Each post still needs engaging text
Frequently Asked Questions (FAQs)
How do I make an Instagram grid?
To create an Instagram grid, use a free Instagram grid maker tool like InstaTrackr to split your large image into multiple square posts. Upload your image, select your grid size (3×1, 3×2, or 3×3), download the split images, and upload them to Instagram in reverse order (last image first).
What is the best Instagram grid maker?
InstaTrackr offers the best free Instagram grid maker with no watermarks, no sign-up required, and support for all grid sizes. It maintains perfect Instagram dimensions (1080x1080px) and works on all devices.
Can I create Instagram grids for free?
Yes! Many tools offer free Instagram grid splitting, with InstaTrackr being the most comprehensive free option. You don’t need paid software or apps to create professional-looking grid posts.
What size should my image be for Instagram grid posts?
For a 3×1 grid, use 3240x1080px. For a 3×2 grid, use 3240x2160px. For a 3×3 grid, use 3240x3240px. Each individual post will be 1080x1080px when split correctly.
How do I upload an Instagram grid in the right order?
Upload your grid posts in reverse order – the last post (bottom-left) first, and the first post (top-right) last. This ensures they appear correctly on your profile since Instagram displays newest posts first.
Do Instagram grid posts get more engagement?
Yes! Grid posts typically see 25-30% higher profile visit rates and improved follower conversion because they create visual intrigue that encourages users to explore your full profile.
How often should I post Instagram grids?
Post grids strategically – aim for 1-2 grid sequences per month. Too many grids can make your feed feel overly planned. Balance with regular content for best results.
Can I create grids on mobile?
Yes, many mobile apps allow grid creation, but web-based tools like InstaTrackr offer better preview capabilities and easier file management. For best results, plan on desktop and upload via mobile.
Conclusion: Transform Your Instagram with Grid Post
Instagram grid posts are more than just a trendy aesthetic choice – they’re a powerful tool for storytelling, brand building, and driving engagement. By following this complete guide, you now have everything needed to create stunning grid layouts that captivate your audience.
Key Takeaways:
✓Plan your grids carefully before creation
✓Use a reliable free Instagram grid maker like InstaTrackr
✓ Upload in reverse order for proper display
✓ Balance grid posts with regular content
✓ Track performance and optimize based on results
✓ Maintain image quality above all else
✓ Make each individual post visually appealing
Whether you’re launching a product, sharing your story, or building your brand aesthetic, grid posts offer unlimited creative possibilities. Start with a simple 3×1 layout, master the basics, then experiment with more complex designs as you grow.
Ready to create your first Instagram grid? Head to InstaTrackr.com and use our free Instagram grid maker to split your images perfectly. No sign-up, no watermarks, just professional results in seconds.
What grid will you create first? Share your grid post ideas in the comments below, and don’t forget to tag us when you publish your masterpiece!

Instagram analytics specialist focused on data accuracy, ethical tracking, and performance-based social media insights.
His work focuses on converting publicly available data into clear, actionable analytics for creators, marketers, and businesses.
As a contributor at Instatrackr, Michael is involved in analytics research, data accuracy review, and content validation to ensure users receive reliable and transparent Instagram insights.


Leave a Reply